Sunday, January 31, 2016

Fabric Transfer Pens and Random Things

I just checked out this new to me gel pen. You write directly on your fabric. I would use this with a light box to trace an embroidery pattern.
When you are done, you use a hot iron and voila! Here it is half done.
Here is the same view. It is completely gone! Like magic. This was just a test. I will try it on my next embroidery project. I love the sharp fine line it makes. I usually use the blue markers that you spray with water for the ink to disappear, but there's alot of dripping and rewetting. I think this might do the trick. 
 I found these at Target in the school/office supply section. A three pack for about $3.50. Much cheaper than the blue markers from the sewing store. Let me know if you've used this method before and how you liked it-as usual I'm late to the party.
 Having fun making some vintage Valentines.
 Our town just opened it's own Dog Park this weekend. The weather has been in the 70's. Amazing for January and perfect for a trip with Bowie.The best thing is, it's 5 minutes from our house.
 He made some new friends and had a great time. That's Cookie on the right.
I've been busy doing alot of random stuff especially outside since it's been so nice. We are supposed to get cold this week.  Need to get focused on a project! Hope your weather is calmed down and you have a great week.
Leslie

Monday, January 25, 2016

Small Projects

A friend of my son's is having her first baby, so I thought I'd make a little something. I know her colors are gray in the nursery. I went to JoAnns and found some cute fabrics. I did the back with white terrycloth.
 To personalize each bib, I did a simple patch. This one is embroidered with gray floss.
 This mini crochet was found in the dollar bins at Michaels.
 Just cut this out of felt and sewed it on.
 I got the pattern off the internet and there are so many free patterns out there. Very fun little project. I also included a Target gift card, so the new parents can buy some diapers or whatever.

Still working away on recipes and trying to organize my little pantry. Will share the progress soon.

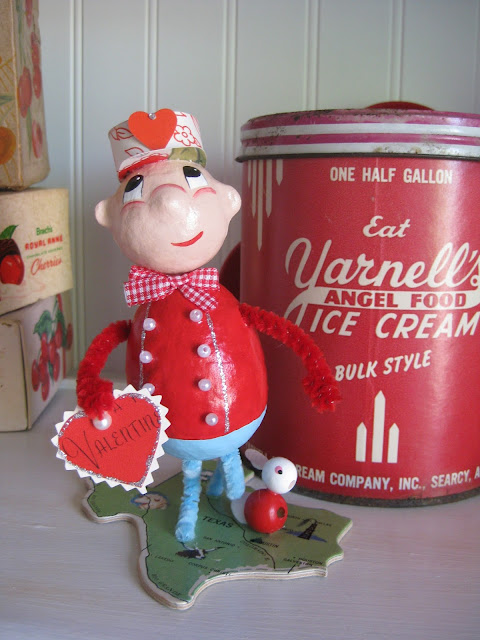
By the way, the little bellhop above was made by E at Creative Breathing. I know some of you will recognize her work. She no longer blogs, but I still love many of her creative projects.

We escaped any bad weather and it will be in the 60's this week. Very nice for walking with Bowie. I hope anyone that got the blizzard is digging out and staying warm. Have a great week!
Leslie

Sunday, January 17, 2016

A Little Heart

I changed up the kitchen hutch for Valentines Day. I removed all the green from Christmas and added a tiny bit of pink. I made these felt conversation hearts a few years ago and always seem to bring them out.
 Here's the whole thing. I'm having a blast changing this hutch out for different seasons.
 Brought over my gumball machine from my craftroom.

 Love these little faces on the salt and pepper shakers.
 The red syrup pourer has M and M's from Christmas. Don't tell anyone.
 On the entry cabinet, I just switched out the letter to Santa with a couple vintage valentines.

 I also added a few vintage chocolate covered cherry boxes, because I love the graphics on them.
 Found this little felt garland at Target in the dollar bins last year and hung it from the mantle for just a touch of Valentines.
I have been busy, doing the year end, or year beginning ? paperwork. I also got an online recipe organizer, called Living Cookbook. I've been typing like a madwoman trying to get years of recipes from all over the house to one place. I'll let you know how that goes.
Thanks so much for all the craftroom love and comments!
I hope any crazy weather is on it's way out for some of you. It has been pretty nice here. Have a super week!
Leslie

Sunday, January 10, 2016

Craft Room Redo Part 2

Here's a picture to remind you of the craftroom overview from last week. If you missed part 1 click here.
This is the antique cupboard in the corner. I use it to display my vintage Oz books that were given to me by my Mom, and the Featherweight sewing machine I learned to sew on. I still pull it out and use it once in awhile. The Dollhouse Sweet Shoppe is above.
 This is a new piece of furniture. Now that son has moved out of town, we needed an extra sleeping spot in addition to the guest room. I also need a comfy place to sit and read and hand sew. This opens into a twin size bed. It's super comfortable to sit on. We've already used it twice during December. Notice the hankie banner at the top.
 Little shelf I use as an end table holds my crafting books. The little tin plate is my coaster. Bowie loves to eat coasters, and he won't touch this one.
My little framed goodies above the sofa.Some of them are vintage, and some I made. The shadowbox frame in the right top corner was a beaded purse that my great grandma was working on. I framed the unfinished piece with all the strings of glass beads.
 Going on around the room, this is the closet door.
 Here's my wrapping paper and a few of my Dad's yardsticks.
 Inside the closet-my Elpha hanging rack for paints, glitter, ribbons on the door. You can see my bins of felt and wool. Everything else I use is stuffed in here.
 Here's the end of the narrow closet. More bins, vintage books. See the old sewing machine on the bottom right? More on this at a later post. On the right wall I hang my apron, iron and plastic quilting rulers. It's filled to the brim!
 Here's the last cabinet. An antique pie safe filled with all my fabric and fat quarters on the top shelf. Vintage sheets on the middle. Felted sweater wool is on the bottom. Old cookie cutters and vintage jello molds are in the drawers.
 And we're back where we started. I hope you liked the tour and maybe got a few ideas. If you have any questions, just leave a comment and I am more then happy to help if I can.
 Lastly, we had an overnight guest over the holiday. This is Sofie. She is a 3 1/2 pound Yorkiepoo. She is full grown and is quite the little diva.
 Bowie is about 8 1/2 pounds and you can see he looks like a giant next to Sophie. He really didn't want any part of her as you can see from the picture. He kinda looks a little disgusted, probably because she was getting all the attention.
Have a good week!
Leslie

Sunday, January 3, 2016

Craftroom Redo Part 1

Happy New Year! Hope you all had a great holiday.When the new year rolls around I get into organizing mode. Actually I reorganized my craftroom right before Christmas. Lots of pictures, so I'll just pop in when there's something to point out. If you've followed this blog for awhile you'll see lots of familiar things. The main reason I redid, was to get a longer more useful desk. To accomplish this, I made an L shaped desk, which meant switching everything else around in this small room.This is looking from the door. Remember the room is about 11 x11 feet.
 The desk was made by using 2 IKEA  Alex drawer systems. I already had one, so I just had to buy one more. I wanted crafting on the right and sewing space on the left. The drawers hold all my stuff I need when sitting down.

 I finally made a new ironing board cover. Many tutorials out there. Super easy and what a difference. The fabric is Berta Ruta from Ikea.
 This is my old chair cover made from a tea towel. Sewing machine cover made from a vintage linen that I fell in love with.
 Here's what;s above the sewing area.My little inspiration shelf full of vintage stuff I love.
 These were my doll clothes from when I was a kid.
 Hubby helped me cut one huge sheet of plywood into 2 long pieces to make the desk top. I just stapled on oilcloth to cover it all and butted them up against each other in the corner.
 Hubs built my paper holder cubby from my measurements. This paper weighs a ton and I'm happy to have it easily reachable now. Excuse the cords-gotta hide those.
 Buttons and game pieces in jelly jars.
 I had my thread in the closet and couldn't see the colors in the bad light. Much better out here. Finally got to put my vintage trim holder out-that used to be in the closet too.Here's how I made this.
 The jury is still out on the brown chair. I found it at the thrift store and it's heavy duty and fits all the way under the desk. If I keep it, It'll get a coat of paint.I may also hang a light over crafting desk for working at night. I'll wait and see on this too.
 Old paper cutter from the thrift store. I almost bought one on Etsy, and held off. Yeah! I can fit this next to the desk on the floor if I need to really spread out on the desk top.
All my scissors and pencils, and markers are easily grabbed from the window sill right over the crafting area.
 This is the shelf above the window. I also made the little window topper from the same fabric as the ironing board cover-Ikea fabric.Here is a link about the paper doll banner.

We added extra metal legs, Sjunne, bought from Ikea for the desk corners and extra support. So far I've wrapped gifts here, colored, worked on the boys ornaments for Christmas. I also sewed the ironing board cover and window topper. I think it's going to work out great.
  We had a great Christmas and nice break. By the way, the boys loved their Christmas ornaments. Next week I'll show you around the rest of the room.
Leslie