Showing posts with label Before and After. Show all posts

Thursday, March 2, 2017

Kitchen Shelves

Well it took me long enough. Some of you guessed correctly-open kitchen shelves in place of the cabinet. Here's the before.
First, dismantle the cabinet and remove from wall.
Then find out that the space left doesn't match the height of the wall texture,darn!
It's about an 1/8 of an inch different.
Fill in with joint compound-layer after thin layer and retexture.
Repaint wall. Start painting brackets and wood for shelf. I used the same paint as my cabinets. Benjamin Moore Advance. Prime, paint 3 coats and cure.I love it, but it's a long dry time and a 3 day cure time. Waiting...
Start installing on wall and get to the last bracket and boom- it just splits into 2 pieces. Now what? Wood glue, joint compound, sanding, and repaint. Waiting...
Finally on the wall. Touch up paint and more waiting...
Finally, the fun part. I am getting ready for spring, will show that next week, so I added in a few touches of green.

I love that anybody can just grab a glass or wine glass.
I'm on the lookout for coffee mugs. I still want to hang them with teacup hooks below the bottom shelf.
I can cross that project off my list. It took way longer then I thought, but I am loving the finished look. Some day I'll get that white subway tile backsplash.
Thanks for being patient with me. On to spring cleaning and spring decorating.
Leslie

Monday, October 17, 2016

The Domino Effect

We finally made the decision to get a king size bed. That decision took over 2 years of sleeping on a super old and super sagging queen mattress. We had it delivered and I knew our old night stands wouldn't work in our small bedroom any more. When son moved he gave this little piece to me. It sat in the garage all these months. Time to start switching. My photo editing program was giving me problems, so these aren't the best photos, but I thought I'd show you how I re-do a piece of furniture.
 I wish you could have seen and felt this. It almost felt like someone had added sand to the paint on the old finish. It was rough like sandpaper.
 So off it came with some stripper. I was planning on repainting, so I just wanted to get the ugly finish off. Stripping and sanding to get through the old varnish.
 Ready to throw some paint on.
 I was wanting a rustic farmhouse look, so I left parts unfinished. I'm going to live with it for awhile and if I don't love it, I can always go back and paint. I added 2 Hobby Lobby knobs. This picture is not staged,(you can see Hubby's weights on the floor). I'll share more after we get some bedding, and a headboard. I absolutely love the bed and have been sleeping like a baby. The domino effect has begun, because now I have to see what will work on the other side of the bed. Does this happen to you?
What do you think of the raw wood with the white paint? If I decide to keep it, I'll put some wax over it, but wanted to leave it raw for now, in case I change my mind.
Off to deal with some plumbing issues and a plumber. Hope you are off to a great week!
Leslie

Monday, September 26, 2016

Kitchen Hutch Through the Seasons

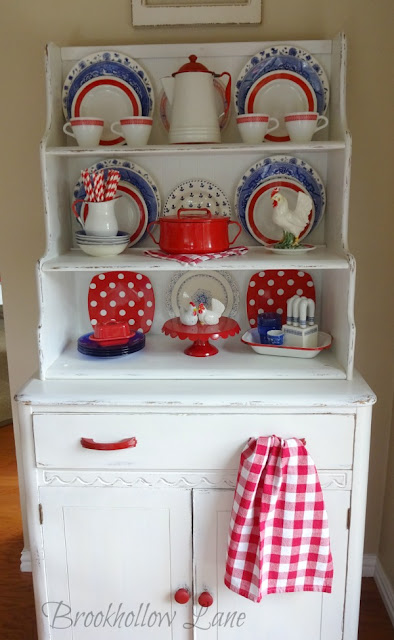
Warning-picture heavy post. This is my kitchen hutch. It sits in my breakfast area, I bought it at the thrift store for about $70 about 5 years ago. I knew it had good bones and with a little love I could bring it back to life. I added a new beadboard backing and trim, lots of white paint. I patched the original knob holes and added some vintage pulls that I had from another project. I have had so much fun changing out the hutch for the seasons and holidays. Here we go!
Here I am decking it out for the first time. I haven't even drilled the holes for the  pulls yet.
The first Christmas.
First Valentines Day.
Notice I had an extra set of brass pulls and knobs(from Hobby Lobby), so I started to change them out depending on the color scheme. The inspiration for the blue and green was the Vera tea towel from my Mom. Green with a touch of blue for springtime.
The first time I decorated it for fall.
I love to add a cute tea towel to go with the theme.

I added more aqua this last year.

 The first time I added blue to the red for the patriotic season.
 This is how it looks today for autumn.


 Here she was when I brought her home.
 
This is the painted naked hutch waiting for some pretties.
If you looked closely you might have noticed I also redid the kitchen chairs. They went from red to white. That way I can change them out for the season too. I  like to decorate the hutch a little different each time, even though I use alot of the same stuff. I hope you enjoyed my little hutch history. I love being able to pull out my vintage dishes and thrift store finds to decorate her.
Be sure and come back next week to check out the Fall in Love With Texas Blog Tour. It goes from Oct 3-7. I'll be showing my fall decor on Oct. 6. Hope to see you there!
Hope you are enjoying your fall season.
Leslie
P.S. It finally cooled down today-gorgeous fall weather at last!

Monday, October 5, 2015

Evolution of a Table

This is the story of the evolution of one thrifted old sewing table. I took the antique sewing head out and have it displayed. First, I used it in my craftroom as-guess what? A sewing table.
 Next, it moved into the family room as an end table/all the tv junk table.
 Then I decided to paint it, and it moved to my bedroom.
 I tried to hide Bowie's crate under it, but the crate kept showing it's ugly old self.

Got a little creative, with some wood and lots of dowel rods and a little help from Hubby.

 So the crate has morphed into the reading table in my bedroom.
 There he is nestled in his cozy quilt and soft pillows.
 Added a cute knob and a little latch.
 There you have it. This is where His Majesty sleeps at night.
 "I like my new digs" says the interior design dog.

Wonder if the little table that could will change into something else? Not for awhile anyway. Lot's of new stuff in my Etsy shop. Will be adding more this week. Joining Tweak it Tuesday at Brenda's Cozy Little House.
Leslie

Friday, November 1, 2013

Closet Makeover

I don't let just anyone look into my messy closet. It's been this way for 2 years-shoes all over the floor. Boxes of finished scrapbooks, piles everywhere.
So this is what we did.
A fresh paint job and custom hanging racks to fit all our clothes.
Here's the after.

This is my favorite part.I love that every pair of shoes has a place-not on the floor.
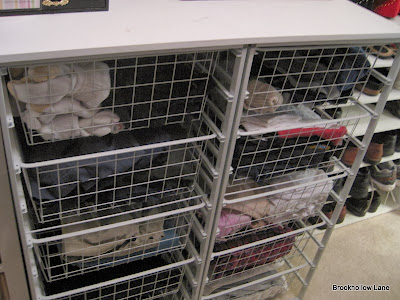
These were ordered from Home Depot. It's the first time Hubby has had drawers to put his tee shirts, socks and underwear.

We bought these from Ikea to fit all the scrapbooks. Now I can pull them out when I want and don't have to wonder which box they are in. If I change my mind down the road we can use the cubbies for folded sweaters, bins, whatever.

We hung the belts and necklaces. I want to add a little art work when I find the right thing.

This is from Nile corp. I have never had a jewelry box. You get to choose the drawer insides to fit your needs. I counted all the earrings, bracelets, etc. and then get the correct inserts. Love this! 10 drawers-now I can fit my Mom's vintage jewelry in and I have actually been wearing it.

We even have cubbies for laundry baskets-white, colored and dry clean. There's even space to keep extra toilet paper above.

This was a 3 weekend job, but totally worth it. Hubby really loves it too. Thanks for bearing with me on the photos-so hard to photograph a long closet. It just goes to show you-the space was there to fit everything- it just had to be re-organized. Getting ready to decorate for fall. Hope you had a great Halloween!
Leslie